Do you want to add more functionality to your car? Are you looking for a way to control various parts of your vehicle with ease? If so, installing linear actuators may be the solution you need.
Linear actuators are devices that convert rotational motion into linear motion. They offer precise control over various parts of your car, from door locks to windows to hoods and trunks. However, many car owners are intimidated by the installation process and don’t know where to start.
Installing linear actuators in your car can seem like a daunting task, but with the right guidance, it can be a simple and straightforward process. In this step-by-step guide, we’ll walk you through the process of installing linear actuators to enhance the functionality of your car. Whether you’re a seasoned car enthusiast or a beginner, you’ll find this guide helpful in getting started.
Step-by-Step Guide to Install Linear Actuators in Your Car

Step 1: Get The Right Tools
The first thing you need to do is select the right linear actuator for the job. If you’re unsure, you can review your specs again to ensure you have the right instruments for the job.
The application and actuator measurements are the most crucial parts of the installation. If this part is done incorrectly, the application or the component may not function as expected.
Step 2: Ensure The Wires Are in Position
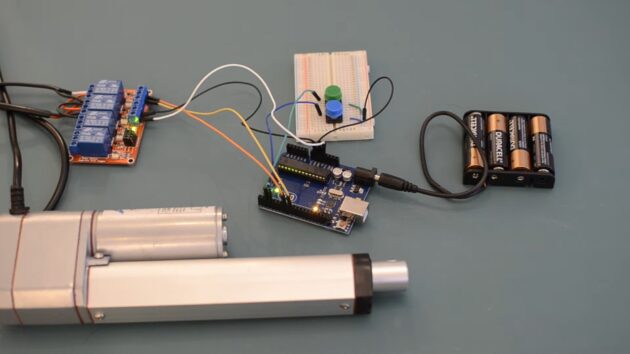
Each has two wires attached to it, positive and negative. It’ll supply power from the source to the linear actuator. The actuator may have more wires for position control. If so, the power supply wires may be thicker than the position control wires.
Step 3: Mount the Bracket
You can install Linear actuators with two different types of mounting brackets. First are the brackets mounted on each end of the actuator, and the others are mounted along the shaft of each actuator.
However, you can install the actuator without using mounting brackets, though it depends on the project. Removing or adding the mounting brackets during installation can help shorten or lighten the amount of room required for actuators that are too short or too long.
If you’re looking for another way to mount, you can as well fabricate your mounting system. Just ensure the system is safe, reliable, and able to withstand the pressure you will place on it.
Step 4: Attach a Power Source
You can use either an AC power adapter or a DC control box. The DC control box allows for more portability where power isn’t readily available. On the other hand, an AC control box allows you to use a household plug.
Step 5: Test Your Actuator

You should now be able to turn on the linear actuator. If it is not moving, carry out troubleshooting to find the problem.
Conclusion
As seen, the installation process of linear actuators is pretty simple. All you need to do is get the proper installation tools and use the guide with the linear actuator to attach the wirings. Then mount the brackets with the application, attach a power source (either an AC power adapter or a DC control box), and test before installing anywhere in your car. This will help you keep your car in excellent shape despite its age.


